 May 19, 2025 - 0 Minutes read
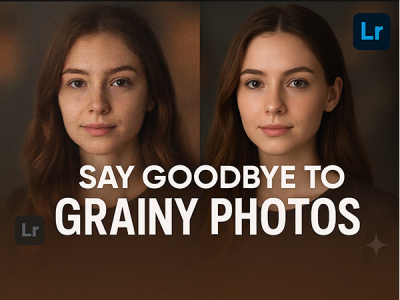
Say Goodbye to Grainy Photos: Lightroom Tips for Cleaner Images
Grainy textures—often referred to as digital noise—are a common challenge in photography, especially when shooting in low-light conditions or with high ISO settings. While some grain can be used creatively for mood or texture, excessive noise can degrade image quality and reduce detail, especially in shadows and flat color areas.
Some of our links may be affiliate links and if you buy through our link, we might generate some commissions.

What Causes Digital Noise?
Digital noise typically occurs when your camera sensor struggles to capture enough light. To compensate, the sensor amplifies the signal, which can introduce random specks of color or brightness—visible as grain. Factors like high ISO settings, long exposures, small sensors, and underexposed areas all contribute to this effect.Types of Noise
There are two primary types of digital noise:
Luminance noise: Appears as grainy, monochrome texture; often seen in low-light images.
Color (chrominance) noise: Shows up as random red, green, or blue specks; more distracting and unnatural.
How It Affects Image Quality Noise can obscure fine details, soften textures, and introduce unwanted color shifts—especially noticeable in portraits or landscapes where clarity and tonal range matter most. While some grain can add character to certain styles of photography, uncontrolled noise can make images appear less professional and harder to process.
Discover Adobe's suite of products.
Shoot Smart: Minimize Grain Before You Edit
While Adobe Lightroom offers robust tools to reduce digital noise, the best results start in-camera. By making smart decisions during your shoot, you can significantly reduce grain before you ever open an editing panel—preserving image quality and giving yourself more flexibility in post.
Keep ISO as Low as Possible
High ISO settings amplify your camera sensor’s sensitivity to light—but also increase the risk of digital noise. Whenever possible, shoot at the lowest ISO that still allows for proper exposure. Use a tripod or steady surface to enable longer shutter speeds in low light without bumping ISO.Expose Correctly—Or Slightly Over
Underexposed photos are more prone to noise, especially when shadows are lifted in post. Aim for a well-balanced exposure in-camera, and consider slightly overexposing (without clipping highlights) to preserve shadow detail. This gives you cleaner data to work with in Lightroom.Use a Wider Aperture
A wider aperture (lower f-number) allows more light to reach the sensor, reducing the need for high ISO. If depth of field isn’t critical to your composition, opening your lens can help maintain brightness without introducing noise.Shoot in RAW
RAW files retain more image data than JPEGs, especially in darker areas. This makes them more resilient to noise and more flexible for Lightroom’s noise reduction tools. Always opt for RAW when you know you’ll be editing or shooting in tricky lighting conditions.Stabilize Your Camera
Camera shake can force you to use higher ISO to compensate for motion blur. Use a tripod, in-body stabilization, or remote shutter release when shooting in low light to keep your exposure clean and your ISO low.
Discover Adobe's suite of products.
Lightroom to the Rescue: Where to Find Noise Reduction Tools
When grain creeps into your photos, Adobe Lightroom offers powerful, easy-to-use tools to bring back clarity and smoothness—without sacrificing detail. Whether you're working with low-light portraits or high-ISO night scenes, Lightroom’s Noise Reduction panel helps you target and reduce both types of digital noise.
Where to Find It
In Lightroom, navigate to the Develop module and scroll down to the Detail panel. This is where you’ll find the Noise Reduction controls, grouped beneath the sharpening settings. You’ll see two main categories: Luminance and Color.Luminance Noise: Grainy Texture
Luminance noise appears as a rough, monochromatic texture—often in shadow areas or evenly toned surfaces. The Luminance slider smooths this noise by averaging tonal variations across pixels. As you increase it, your image will appear cleaner, though overly aggressive use can soften detail. Use the Detail and Contrast sliders below to recover edge sharpness and balance.Color Noise: Unwanted Specks
Color noise, also known as chroma noise, shows up as random red, green, or blue specks. Lightroom’s Color slider targets these without affecting image sharpness. It’s typically less destructive and can often be corrected with moderate adjustments. Use the accompanying Detail and Smoothness sliders to refine the cleanup and avoid color blotchiness.Work at 100% Zoom for Accuracy
Noise reduction is most effective when viewed up close. Zoom to 100% to assess changes accurately, especially when balancing noise removal with fine detail preservation.
Discover Adobe's suite of products.

Smooth but Sharp: Balance Clarity with Cleanliness
Reducing noise in your photos is essential—but not at the cost of losing important detail. Adobe Lightroom gives you precise control to clean up grain while keeping edges crisp and textures natural. By carefully balancing noise reduction with sharpening and texture adjustments, you can achieve images that look both smooth and sharp.
Start with Luminance Noise Reduction
In the Detail panel, begin by adjusting the Luminance slider to reduce grainy texture. A moderate setting (between 20–40) often cleans up shadow noise effectively without over-softening the image. Watch for any loss of edge clarity, and adjust based on the subject matter—portraits can handle more smoothing than landscapes.
Recover Detail with Fine Controls
Use the Luminance Detail and Contrast sliders to fine-tune how much sharpness is preserved:
Luminance Detail helps retain subtle textures in skin, fabric, or foliage.
Luminance Contrast protects dynamic range in areas with soft lighting or gradients.
Start with a middle value and adjust gradually to find the right balance between smoothness and structure.
Sharpen with Intention
After reducing noise, reintroduce clarity with the Sharpening controls. Begin with a moderate Amount (around 40–60) and increase the Radius for broader edge emphasis. Use the Masking slider (hold Alt/Option while dragging) to restrict sharpening to high-contrast edges—preventing noise from being exaggerated in flat areas.
Enhance or Soften Texture Selectively
The Texture and Clarity sliders in the Basic panel offer subtle control over perceived sharpness. Use Texture to enhance or reduce fine detail (like skin or fabric) without introducing noise. Clarity, meanwhile, boosts midtone contrast, which can sharpen the overall impression of an image—but should be used lightly after noise reduction.
Discover Adobe's suite of products.

Use AI-Powered Denoise for High-Impact Fixes
When traditional noise reduction isn’t enough, Adobe Lightroom’s AI-powered Denoise tool steps in with next-level results—delivering clean, detailed images even from high ISO or low-light captures. Built on Adobe Sensei, this feature uses machine learning to analyze and intelligently reduce noise while preserving fine detail and natural textures.
Where to Find It
In Lightroom (or Adobe Camera Raw), select your RAW image and click the Denoise button in the Detail panel. This opens a dedicated AI dialog where you can preview changes and adjust the intensity of the denoise effect using a simple slider.Perfect for Challenging Lighting Conditions
Whether you’re shooting night photography, concerts, or indoor scenes with minimal lighting, high ISO settings can introduce visible grain and color noise. The AI Denoise tool excels in these situations, offering a dramatic cleanup that would take much longer to achieve with manual sliders.Preserves Sharpness and Texture
Unlike traditional noise reduction methods, AI Denoise is designed to maintain edge sharpness and natural detail—especially in areas like hair, foliage, or textured surfaces. It intelligently separates true image content from digital noise, giving you smoother results without the waxy, over-processed look.Non-Destructive and High Quality
Once applied, Lightroom creates a new DNG copy of the image with the denoise effect baked in—keeping your original file untouched. This ensures a high-quality, editable version optimized for additional adjustments and final output.Streamlined for Speed and Simplicity
AI Denoise simplifies the noise reduction process into one powerful step. No need to fine-tune multiple sliders—just choose your strength, preview the result, and let Lightroom handle the rest.
Discover Adobe's suite of products.
Preserve the Mood: Reduce Grain Without Losing the Look
Not all grain is bad. In fact, a subtle texture can add warmth, atmosphere, or a vintage, filmic feel to your images. Adobe Lightroom gives you the tools to reduce unwanted digital noise while still preserving (or even enhancing) the mood of your photo. The key lies in balancing cleanup with intention—refining your image without stripping away its character.
Refine, Don’t Erase
When working with atmospheric or stylistic grain—such as in film emulations or moody portraits—avoid aggressive noise reduction. Start with low to moderate Luminance Noise Reduction in the Detail panel to smooth out harsh digital grain while retaining an organic texture.Use Color Noise Reduction Subtly
Color speckling can feel artificial, even in stylized images. Lightroom’s Color Noise Reduction can clean up unwanted chromatic blotches while preserving the warm or cool tones that contribute to your image’s mood. Use it sparingly to refine rather than flatten color depth.Leverage Texture and Clarity for Mood
After reducing noise, reintroduce depth with the Texture and Clarity sliders. These tools help bring back surface detail and midtone contrast without amplifying grain. For a softer, cinematic feel, reduce Clarity slightly while increasing Texture just enough to maintain presence.Add Grain with Intention
If your cleanup feels too “sterile,” reintroduce a controlled grain effect using Lightroom’s Effects panel. This allows you to apply a film-like texture that’s more pleasing and less distracting than raw sensor noise. Adjust Amount, Size, and Roughness to tailor the grain to your creative vision.Protect Shadows and Highlights
The mood of an image often lives in its shadows and highlight roll-offs. Be careful not to over-smooth these areas, which can erase subtle tonal shifts. Use Lightroom’s Masking tools to selectively apply noise reduction only where it’s needed, keeping the emotional impact intact.
Discover Adobe's suite of products.

Before & After: Compare Your Edits for Best Results
Noise reduction is a balancing act—cleaning up digital grain without compromising detail, tone, or mood. That’s why Adobe Lightroom’s Before & After views are essential when fine-tuning your edits. These built-in comparison tools let you evaluate changes in real time and ensure your adjustments enhance the image without overprocessing it.
Use the Backslash Key for Instant Comparison
Simply press the \ (backslash) key while in the Develop module to toggle between your original and edited image. This quick side-by-side helps you spot subtle differences in texture, detail, and color fidelity—especially important when evaluating the impact of noise reduction.Split and Side-by-Side Views
Click the Y|Y icon below the image area to activate split-screen or side-by-side comparisons. You can view your image with different levels of noise reduction applied, helping you decide if your adjustments strike the right balance between smoothness and sharpness.Zoom In for Detail, Zoom Out for Context
Noise often hides in the shadows or fine textures. Zoom to 100% when inspecting noise reduction in skin, sky, or foliage, and then zoom out to assess the overall mood and tonal balance. Lightroom’s comparison tools make it easy to flip between detailed inspection and big-picture evaluation.Compare Multiple Versions with Snapshots or Virtual Copies
Create snapshots or virtual copies to test different levels of noise reduction or sharpening strategies. You can switch between them quickly, helping you choose the version that best fits your creative intent.Trust Your Eyes—and Your Tools
Noise reduction isn’t one-size-fits-all. Lightroom’s comparison features give you the feedback needed to make confident, image-specific decisions. Whether you’re refining a high-ISO night shot or subtly cleaning up a stylized portrait, visual comparison ensures your edits stay effective and intentional.
Discover Adobe's suite of products.
Export Like a Pro: Save Clean Images in the Right Format
After perfecting your edits in Adobe Lightroom—including reducing noise—it’s essential to export your images in the right format and settings to maintain that polished look. Whether you’re preparing photos for web, print, or portfolio use, smart export choices ensure your denoised images stay clean and sharp without reintroducing artifacts.
Choose the Right File Format
JPEG is ideal for web and social media—keep quality set to 80–100 for clean results with manageable file sizes.
TIFF is best for print or high-quality archives, as it preserves full image detail with no compression artifacts.
DNG is useful for maintaining an editable RAW format, especially if using Lightroom’s AI Denoise tool.
Mind Your Output Sharpening
When exporting, Lightroom allows you to apply Output Sharpening based on destination:
For screen: use “Sharpen for Screen” with a Standard amount.
For print: choose “Sharpen for Matte or Glossy Paper” to ensure clarity without adding grain-like sharpening artifacts.
Maintain Resolution for Print, Optimize for Web
For print, export at full resolution (300 ppi) to retain detail and clarity in physical formats.
For web, you can resize images to specific pixel dimensions (e.g., 2048 px wide) and set resolution to 72 ppi, which keeps files optimized for fast loading without visible degradation.
Avoid Over-Compression
Excessive compression can undo your careful noise reduction by introducing new artifacts. When exporting JPEGs, use the highest quality settings that still meet your file size goals—especially for portfolio work or client delivery.
Embed Color Profile
To ensure consistent color across devices, always check “Include Color Profile” (sRGB) when exporting for the web or digital presentation. This preserves color accuracy across browsers and screens.
With Lightroom’s powerful export options, your denoised images can move from edit to output without losing impact. By exporting thoughtfully, you preserve the quality of your work—whether it’s viewed on a screen, printed for display, or added to a professional portfolio.