 Apr 17, 2025 - 0 Minutes read
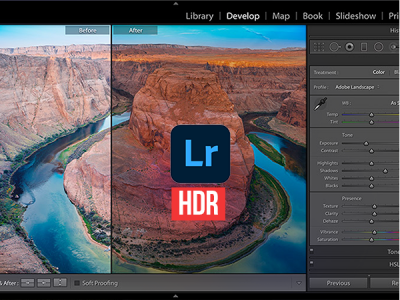
The Ultimate Guide to HDR Photo Editing in Adobe Lightroom
High Dynamic Range (HDR) photography is a vital technique for capturing scenes with extreme differences in lighting—think glowing skies paired with darkened landscapes or bright windows set against dimly lit interiors. HDR enables photographers to preserve essential detail across light and shadow by combining multiple exposures into a single image. Adobe Lightroom simplifies this process through a non-destructive, intuitive workflow, offering control from import to final export. Whether you're just exploring HDR or looking to refine your process, this guide walks you through the tools and techniques to confidently help you create natural-looking, high-impact images.
Some of our links may be affiliate links and if you buy through our link, we might generate some commissions.

What is HDR Photography and Why It Matters
HDR photography is a method where several exposures of the same scene—typically one underexposed, one normal, and one overexposed—are merged to form a single image with a full dynamic range. This technique compensates for the limitations of most camera sensors, which can struggle to capture both bright and dark areas simultaneously.
Imagine photographing a landscape at sunset. Without HDR, you might expose correctly for the sky and lose detail in the shadows, or do the opposite and wash out the sky. HDR allows you to retain the vibrancy of the sunset while preserving texture in the foreground.
In Adobe Lightroom, HDR merging is directly integrated into the editing process. The software handles alignment and tone mapping, reducing ghosting (which can happen if things move between shots) and keeping fine details intact. This integration means photographers don't need separate software or complex workarounds—it all happens within the Lightroom ecosystem.
For editors, HDR enables more than just technical accuracy. It supports creative storytelling through light, offering nuanced tonal control. From natural-looking scenes to more stylized edits, HDR in Lightroom expands your editing potential significantly.
Discover Adobe's suite of products.

Getting Started: Preparing Your HDR Images in Lightroom
The first step in successful HDR editing is capturing and organizing your bracketed exposures. These are usually shot quickly using your camera's bracketing feature, often at one- or two-stop intervals.
In Lightroom, use the Import dialog to bring in your HDR sequences. Keep your sets organized—shoot in continuous mode if possible, and use consistent filenames or timestamps to ensure you can easily group related exposures.
After import, switch to the Library module. Use the Stacking feature to consolidate each bracketed set into one thumbnail. This not only declutters your workspace but also makes it easier to manage batches of HDR photos. Simply select a sequence, right-click, and choose Stacking > Group into Stack.
To further streamline your workflow, consider creating a dedicated HDR collection or applying keywords like "HDR," "bracketed," or even location-based tags. This becomes especially helpful as your catalog grows.
Proper organization up front saves significant time later, allowing you to focus on the creative side of editing rather than hunting for files.
Discover Adobe's suite of products.

Merging Exposures: Creating HDR in Lightroom
With your bracketed images stacked and ready, HDR merging in Lightroom is just a few clicks away. Select the images in a bracketed set, right-click, and choose Photo Merge > HDR, or use the shortcut Ctrl+H (Windows) / Cmd+H (Mac).
This opens a preview window with several options:
- Auto Align: Crucial for handheld shots; this ensures your images are correctly aligned even if your framing shifted slightly.
- Auto Settings: Lightroom applies automatic tone corrections to give you a balanced starting point—useful for previewing the final result quickly.
- Deghost Amount: This reduces motion artifacts from moving objects like leaves or people. Based on the amount of movement, choose from None, Low, Medium, or High.
You'll also see a checkbox that says "Show Deghost Overlay," highlighting the corrected areas. This is particularly helpful in identifying whether movement is causing issues in your merge.
Click Merge, and Lightroom creates a new .DNG file. This new file acts like a raw photo, giving you maximum flexibility for non-destructive editing in the Develop module.
Discover Adobe's suite of products.

Fine-Tuning the Merge: Essential HDR Settings to Know
The preview options you choose during the merge can significantly influence your final image quality. Here's a deeper dive into each setting:
- Auto Align is indispensable for handheld captures. Even on a tripod, it can help correct minor shifts, ensuring sharpness.
- Auto Settings is great for beginners or batch processing. It adjusts exposure, contrast, highlights, and shadows based on Lightroom's algorithms. While not always perfect, it offers a solid starting point.
- Deghosting helps when movement between frames introduces blur or artifacts. None or Low works well for static scenes. Medium or High might be necessary for dynamic scenes—think windy landscapes or street scenes. Just be cautious: over-deghosting can cause artifacts of its own.
These settings help you lay a clean, high-quality foundation before you begin creative edits.
Discover Adobe's suite of products.
Post-Merge Magic: Enhancing Your HDR Photo
Once merged, head into the Develop module to refine your HDR image.
Exposure and Contrast
Use the Exposure slider to balance the overall brightness. HDR images often benefit from slight exposure corrections to look more realistic. Next, adjust the contrast to restore the punch without making the image look artificial.
Highlights and Shadows
The real strength of HDR editing lies here. Lower the Highlights slider to recover detail in skies or other bright elements. Then, lift Shadows to bring back details to darker areas. Be careful not to overdo it, as flattening contrast can make your image look dull.
Clarity and Texture
Apply Clarity to boost midtone contrast, which adds definition. Use Texture to enhance surface detail. Both sliders work well together, but restraint is key—too much and your photo might look over-processed.
White and Black Points
To give your image proper tonal range, adjust the Whites and Blacks while holding the Alt (Option) key. This shows clipping indicators to help prevent loss of detail.
This stage is about shaping your image's overall feel, balancing technical precision with artistic intention.
Discover Adobe's suite of products.

Advanced Techniques: Local Adjustments and Masking
Once your global edits are in place, turn to Lightroom's powerful local adjustment tools for fine-tuning.
- Adjustment Brush: Perfect for dodging and burning—brightening specific elements or increasing local contrast.
- Radial Filter: Use it to emphasize subjects or create natural lighting effects.
- Linear Gradient: Ideal for enhancing skies, grounding light in landscapes, or balancing interior scenes.
- AI Masks: With a single click, Lightroom can detect and isolate skies, subjects, or backgrounds. This allows for incredibly targeted adjustments—like brightening a face or enhancing just the sky—without affecting the whole image.
These tools are where your style shines through. They allow you to make surgical edits that enhance without overwhelming.
Discover Adobe's suite of products.
Keeping It Real: Avoiding the Overcooked HDR Look
The HDR look has a reputation—often negative—for being overdone. Here's how to avoid that trap:
- Subtle Adjustments Over Sliders to the Max: Avoid pushing every slider to extremes.
- Leave Some Contrast: Not every shadow needs to be lifted, and not every highlight should be recovered.
- Maintain Natural Colors: Use HSL to fine-tune individual hues and keep them grounded.
- Avoid Halos: Zoom in to check for strange glow effects around objects, often side effects of heavy local adjustments or deghosting.
- Balance Technical and Artistic Judgement: Your histogram is a guide, not a rule. Trust your eye.
When in doubt, take a break and return with fresh eyes. If something feels off, it probably is.
Discover Adobe's suite of products.
Export Like a Pro: Saving and Sharing Your HDR Masterpiece
When your image is ready, it's time to export. Match your export settings to your intended use:
- For Web: Export as JPEG, 72ppi, with a long edge around 2048px.
- For Print: Use TIFF or high-quality JPEG at 300ppi with appropriate dimensions.
- For Editing Flexibility: Export as DNG to maintain raw-level detail across software or devices.
Set Output Sharpening based on your medium screen for web, and Matte/Glossy Paper for prints. Depending on your printer's profile, choose sRGB for online viewing or AdobeRGB/ProPhotoRGB for printing.
You can also include metadata or apply a subtle watermark using Lightroom's Export dialog.
With these settings, your HDR images will maintain quality, detail, and impact across formats.
Discover Adobe's suite of products.
Troubleshooting Common HDR Editing Issues
Sometimes, things go sideways. Here's how to fix it:
- Color Shifts: Adjust the White Balance or use the HSL panel to correct odd hues.
- Halos: Lower Clarity/Dehaze or reduce local adjustment overlap.
- Ghosting: Increase the Deghost Amount or re-merge with fewer exposures.
- Flat Images: Reintroduce contrast and adjust tone curves.
- Noise in Shadows: Apply Luminance Noise Reduction and be conservative with Shadow recovery.
A little troubleshooting goes a long way toward maintaining clean, compelling results.
Discover Adobe's suite of products.
Final Thoughts: Elevate Your Photography with HDR in Lightroom
HDR photography offers more than technical advantages—it's a creative tool for exploring depth, light, and emotion in ways traditional editing can't always match. With Lightroom's seamless workflow, you can confidently integrate HDR editing into your process.
Whether you're a beginner capturing dynamic scenes or an experienced shooter pushing creative boundaries, HDR in Lightroom helps you tell richer, more detailed visual stories. With thoughtful merging, restrained editing, and smart exporting, your images will not only stand out but also feel authentic to the moment they capture.